
It has been much too long since I've posted new content here - nearly 5 years in fact.
I'm starting out 2022 with putting more effort into my photography. This involves a few key things that I've done or intend to do.
- Getting out more with the camera - at least once a week.
- Posting more on Instagram and my Facebook page (from these more frequent outings).
- Refreshing my website.
- Creating a new YouTube channel with the intent to begin posting content.
- And, might as well include, posting on this blog.
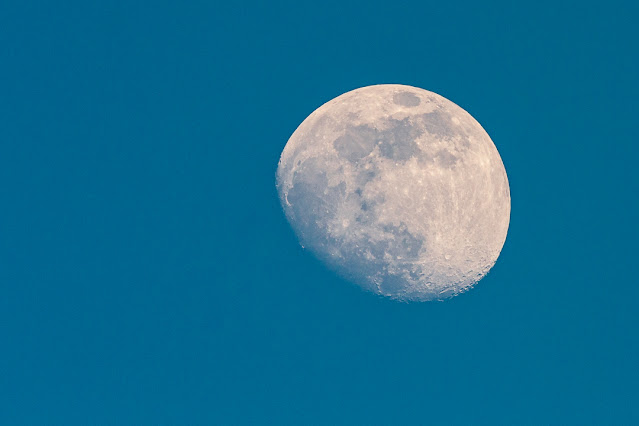
The above photo is a recent one that I posted. I received a question on lens and camera settings, so I wanted to go ahead and expound a bit on the answer here.
The first part of the equation was likely the easiest - what lens did I use?
I've been shooting mainly with The Tamron 150-600mm G2 lens, and was doing so on this particular day as well. My primary subject was the wildlife (mostly birds) found at Baskett Slough National Wildlife Refuge.
Initially, when asked what the settings were, I answered that I didn't recall. Now that I've had a change to check the image, I do know. I'll put those a little lower, but I'll go ahead and share what my answer is in regards to settings.
A key to photographing the moon is to realize what the light source actually is for your image. The moon, of itself, does not produce any light, it merely reflects the sunlight that reaches it. It should be exposed much like you would any other object in full sunlight.
Sunny f/16: The Sunny f/16 rule states that in full sunlight your shutter speed should be the reciprocal of your ISO when the aperture is set to f/16. For example, at ISO 200 you would have a shutter speed of 1/200th sec. paired with an aperture of f/16.
Of course, there is always going to be some variation required depending on the intensity of the sunlight. Typically the sun hitting the moon, and reflecting back to you, is not as intense as direct light at noon in a desert. The phase of the moon may also require some adjustments.
I was already capturing my subjects on a clear day with sunshine. The moon was quite visible during the day, which is actually a good time to photograph it. I did not need to make much, if any, adjustment to my settings when I aimed my lens toward the moon. The settings that I already had 'dialed in' were sufficient for the job.
With the appropriate settings it is quite possible to get a decent photograph of the moon without a tripod, much as I did on this particular day. Also remember that due to how quickly the moon travels (in relation to the earth), a longer exposure is not recommended. It is easy to get motion blur if you are not careful. I have seen recommendations to keep your shutter speed faster than 1/2 a second, however I would recommend 1/30th second or faster, especially when using a longer lens.
Much too often photos of the moon are taken after dark and result in a couple different things.
- A black image with a decently exposed moon in a very small portion of it.
- A dark, but not completely black image, with a large, blurry, white spot that is completely blown out.
Would you believe that I've done both of those? The more common is the bright white blur because often in our desire to show the scene, we don't consider what the proper exposure for the moon is.
Anyway, I said that I would share my exact settings for this image.
- ISO 400
- f/6.3
- 1/1250 sec.
- 600mm
Want to give it a try, but need a longer lens? Check out the Tamron lens on Amazon:
https://amzn.to/3Jykhqv (Canon)
https://amzn.to/33qi1Cm (Nikon)
If you do choose to purchase via these links, I will receive a small commission, at no additional cost to you.
Find me on:
No comments:
Post a Comment